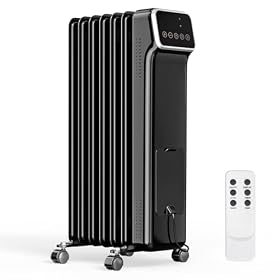
An oil-filled heater may feel hot but still fail to warm a room because of thermostat settings, drafts, poor placement, excessive room size, or a fault. Follow these checks in order before replacing it.
An oil-filled heater that is not warming the room usually has a heat-loss, thermostat, setup, or sizing problem—not necessarily a failed heating element. First confirm that the heater is actually heating, then check its settings and placement. If it stays cold, smells burnt, trips the breaker, or shows damaged wiring, unplug it and stop using it.
1. Confirm that the heater is producing heat
Set the heater to its highest heat setting and turn the thermostat up temporarily. After several minutes, carefully check whether the radiator fins are becoming warm. Do not touch very hot surfaces with bare skin.
Fins are warm, but the room is still cold: The heater may be undersized for the room, the thermostat may be cycling normally, or the room may be losing heat through drafts.
Only part of the heater warms up: Some temperature differences are normal while the oil circulates, but a heater that remains mostly cold may have a control or heating-element fault.
The heater is completely cold: Check the outlet, power switch, thermostat, and circuit breaker.
Oil-filled heaters warm gradually. They are not designed to produce an immediate blast of hot air, so allow time for the room and nearby surfaces to warm before judging performance.
2. Check the thermostat and heat settings
A low thermostat setting can make the heater shut off before the room reaches the temperature you expect. Turn the thermostat higher than the current room temperature and select the highest heat setting for a short diagnostic check.
Also check for:
A timer or scheduled setting that turns the heater off
An energy-saving or low-power mode
A control panel lock
A tip-over safety switch that has not reset because the heater is tilted
A remote-control setting that differs from the controls on the heater
Once the room is comfortable, lower the thermostat. The heater switching on and off is usually normal thermostat operation, not proof that it has stopped working.
Product prices and availability are accurate as of the date/time indicated and are subject to change. Any price and availability information displayed on Amazon.com at the time of purchase will apply to the purchase of this product.
3. Look for drafts and excessive heat loss
A working heater may not overcome continuous heat loss. Check windows, exterior doors, poorly insulated walls, crawl spaces, and gaps around vents. Close doors to unused areas and keep windows shut while the heater is running.
If the room is large, has high ceilings, or is poorly insulated, the heater may be operating normally but lack enough output for the space. Check the heater's rated wattage and the manufacturer's room-size guidance rather than relying only on the heater's physical size.
Do not use multiple high-power heaters on the same circuit unless the circuit can safely support the load. If you are unsure, ask a qualified electrician.
Product prices and availability are accurate as of the date/time indicated and are subject to change. Any price and availability information displayed on Amazon.com at the time of purchase will apply to the purchase of this product.
4. Improve placement and airflow
Place the heater on a level, hard, stable surface with the required clearance from walls, furniture, curtains, bedding, and clothing. Keep it away from drafty doorways and do not hide it behind furniture.
Oil-filled heaters rely on natural air movement around the fins. Blocking the top, sides, or front can reduce heat circulation and create a fire hazard. Never cover the heater or use it to dry clothes.
For better room circulation, leave interior doors positioned as needed for the room you are heating. A ceiling fan on a low setting may help mix warm air, but avoid directing a strong draft at the heater.
5. Check the power connection safely
Plug the heater directly into a properly functioning wall outlet unless the manufacturer specifically allows another arrangement. Avoid extension cords, power strips, and adapters; high-wattage heaters can overload them.
Try the outlet with a small appliance, or check whether the circuit breaker has tripped. If the heater repeatedly trips the breaker, makes buzzing or crackling sounds, shows melted plastic, or has a hot plug or cord, unplug it and do not continue troubleshooting. Have the outlet or heater inspected by a qualified professional.
Never remove the heater's cover or attempt to repair its wiring yourself. The internal oil system and electrical components are not user-serviceable unless the manufacturer specifically provides a safe repair procedure.
6. Check for physical damage or an oil leak
Inspect the casing, fins, cord, plug, and controls while the heater is unplugged and cool. An oily residue, dented radiator section, cracked housing, damaged cord, or unusual burning odor is a reason to stop using the unit.
Do not try to refill or open an oil-filled heater. The sealed oil circuit is not intended to be serviced at home. Contact the manufacturer if the heater is under warranty; otherwise, replacement is generally safer than repair when the sealed body or heating assembly is damaged.
When should you replace the heater?
Replacement is reasonable when:
The heater remains cold even with a confirmed working outlet and correct settings
It shuts off unexpectedly or repeatedly trips the breaker
The cord, plug, controls, or casing is damaged
It leaks oil or has a persistent burning smell
It is correctly sized and placed but cannot maintain a comfortable temperature
Replacement parts or professional repair would cost close to a new heater
Choose a replacement based on the room's heat loss, the heater's listed wattage and coverage guidance, thermostat quality, tip-over protection, overheat protection, and available clearance. Safety features do not make an unattended heater risk-free, so follow the manual and local fire-safety guidance.
FAQ
Why is my oil-filled heater hot but the room is still cold?
The heater may be undersized for the room, the thermostat may be cycling at a low setting, or drafts and poor insulation may be carrying away heat faster than the heater can replace it. Check the setting, placement, room size guidance, windows, and doors.
How long does an oil-filled heater take to warm a room?
Oil-filled heaters warm more gradually than fan-forced heaters because they heat the oil and radiator body before warming the surrounding air. The time depends on wattage, room size, insulation, starting temperature, and drafts.
Can I use an extension cord with an oil-filled heater?
Generally, no. High-power space heaters should normally be plugged directly into a suitable wall outlet. Follow the manufacturer's instructions, and stop using the heater if the plug, cord, or outlet becomes hot.
Why does my oil-filled heater keep turning off?
The thermostat may be reaching its set temperature, or a timer, low-power mode, or safety switch may be active. If it shuts off while the room remains cold, trips the breaker, or shows signs of overheating, unplug it and seek qualified service or replace it.
Do oil-filled heaters need replacement filters?
Most oil-filled radiators do not use an air filter because they do not force room air through a filter. Keep the fins and surrounding area clear of dust, following the manufacturer's cleaning instructions, and never clean or service the heater while it is powered.